We use cookies to make your experience better. To comply with the new e-Privacy directive, we need to ask for your consent to set the cookies. Learn more.

Plugin installation instructions
Please check the following installation instructions
- When and how to run the installer
- What can I do if the installer doesn't start on my computer?
- How do I get and install my purchased license?
- What can I do if my MCP or OVH is not found?
- License policy
- Captured data
If you don't feel safe to follow these guidelines, you may want to consider purchasing our Installation support. We will then install the plugin (either demo or purchased version) on your computer, using remote control software like TeamViewer and/or Skype, Should we not succeed, we will fully refund the value of the installation support, as well as the cost for our CPFlight plugin you may already have purchased
When and how to run the installer
The plugin is installed and updated with a dedicated and specialized installer software. You can download the installer at https://www.midwest737simulations.com/downloads/installer
The installer supports several use cases and should be (re-)run in any of the following situations:
- Installation of the free demo version
- License installation or upgrade after purchasing a full version. See procedure below
- Plugin update to a more recent version
- License recovery
- License update to support additional computers or after computer reinstallation
Please uninstall any existing CPFlight plugin and terminate any CPFlight test software before running the installer, as it would interfere with the installation process. As long as another software occupies the COM port, the Installer is unable to identify the MCP or OVH.
The installer must run on your X-Plane computer and has the following prerequisites
- A Java JRE (>= 1.8.0_101)must be installed on your X-Plane computer. Oracle Java is fine, but since Oracle changed its licensing terms, we now recommend AdoptOpenJDK. If you don't have it, download and install a JRE .msi file, like this one for Windows(subject to change in future Java versions)
- A working internet connection
- Your MCP or OVH must be connected
The installer comes as an executable JAR file. There's no need to unpack the downloaded .jar file. If you have Java installed, it should run by clicking on it. On OSX, Java requires programs to be signed, but it tells you what to do to run an unsigned JAR file.
What can I do if the installer doesn't start on my computer?
We've had a very small number of bug reports that the installer doesn't open when clicking on it or only briefly shows the startup screen and then closes down automatically. Until now, we weren't able to fully trace down the problem, but the customers reported that the problem went away when the installer was started with administrative privileges from the command line. Check this video to see how to run a downloaded java file from the command line. Please mail us at support@midwest737simulations.com if you encounter this or similar problems.
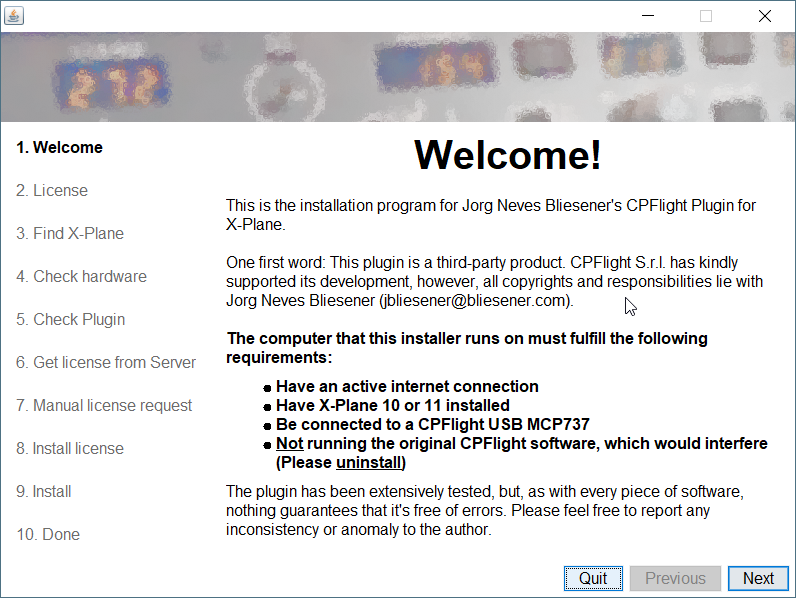
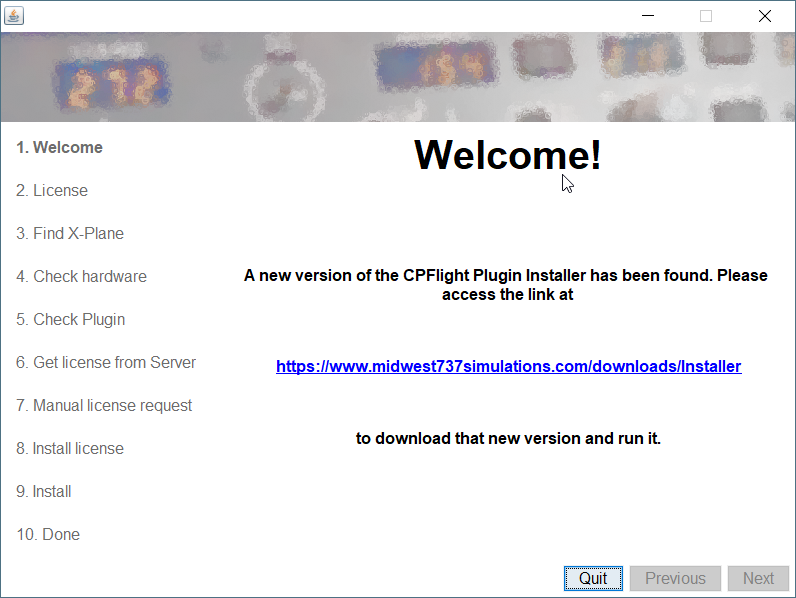
Upon start, the installer automatically verifies its version and asks you to download a new version if yours is outdated. It then guides you through the sequence of screens that install the plugin and the associated license.
How do I get and install my purchased license?
The first step is to purchase a version on the web store. If you are a first time customer, you will have to create a user name (which is your email address) and password. Remember these well, because you will use them later in the installer to retrieve you license.
After completing the payment, rerun the installer.
The remaining procedure depends on whether the installer finds a valid or invalid demo license on your computer.
- Temporary: If you want to install a license for the CPFlight OVH panels:
- Please go through the installer. When it shows you a list of available licenses, please click on "Request or install a manually issued license file".
- If you have an email program installed on your computer, it will automatically compose a message with all required data. Send the email and you're done. We'll get back to you with a license file.
- If you don't have an email program installed, your computer will open a window showing the contents of the CPFlight plugin directory. Please pick the "CPFlightReplacement.req" file from that directory and send it to us by email. The address is either jbliesener@bliesener.com or support@midwest737simulations.com. We'll respond with a license file.
- Once you receive the license file by email, save it to a folder and start the installer again. It'll automatically ask you for the received file. Specify the location of the saved file and it'll be installed.
- If you do not have any license installed - neither demo nor purchased:
- The installer will offer you to install a demo license. Click on "Retrieve purchased license".
- You'll see a screen asking for your web store credentials: user name (which is your email address) and password. Please type them exactly as you did on your purchase on the web store. If you don't remember, click on "Open Web Store" and reset your password.
- The installer will now do another scan for valid licenses and show them in a list. Select the one you purchased and continue
- If you have a valid license and upgrade it to a purchased one (from DEMO to BASIC or ADVANCED or from BASIC to ADVANCED):
- The installer will state the fact that you have a valid license. Click the option "Request a new or existing license".
- The installer will show a list of options which contains the current license. Make sure to choose "Retrieve purchased license".
- You'll see a screen asking for your web store credentials: user name (which is your email address) and password. Please type them exactly as you did on your purchase on the web store. If you don't remember, click on "Open Web Store" and reset your password.
- The installer will now do another scan for valid licenses and show them in a list. Select the one you purchased and continue
- The installer asks you if you want to overwrite your current valid license. Confirm.
- If your demo license has expired already, the process is straightforward:
- You'll see a screen asking for your web store credentials: user name (which is your email address) and password. Please type them exactly as you did on your purchase on the web store. If you don't remember, click on "Open Web Store" and reset your password.
- The installer will scan for valid licenses on the server and show them in a list. Select the one you purchased and continue.
What can I do if my MCP or OVH is not found?
The installer queries all found USB COM ports and, optionally, a manually entered IP address for CPFlight MCPs. There are some reasons why this process can fail, but fortunately, all of them can be solved easily:
- Problem: The MCP or OVH is not connected to your computer or your network.
- Solution: Connect the MCP or OVH and make sure it's turned on.
- Problem: You're trying to connect a CPFlight USB MCP or OVH on Windows and you don't have the standard serial driver installed. This is a Windows installation problem that should not happen, but we have received reports that it sometimes does occur.
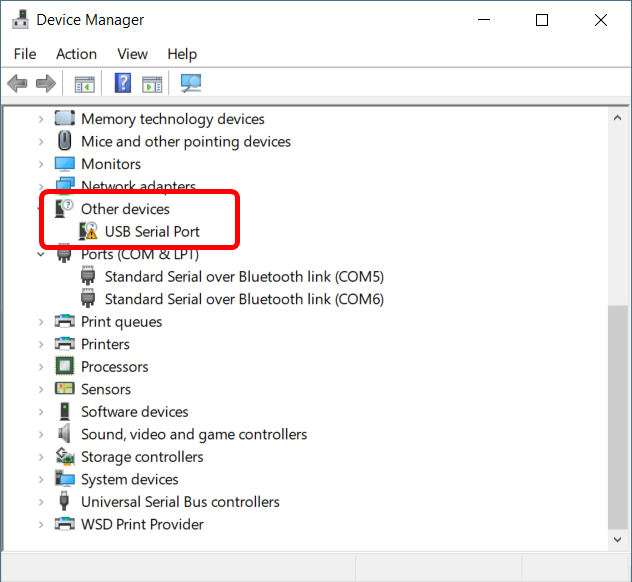
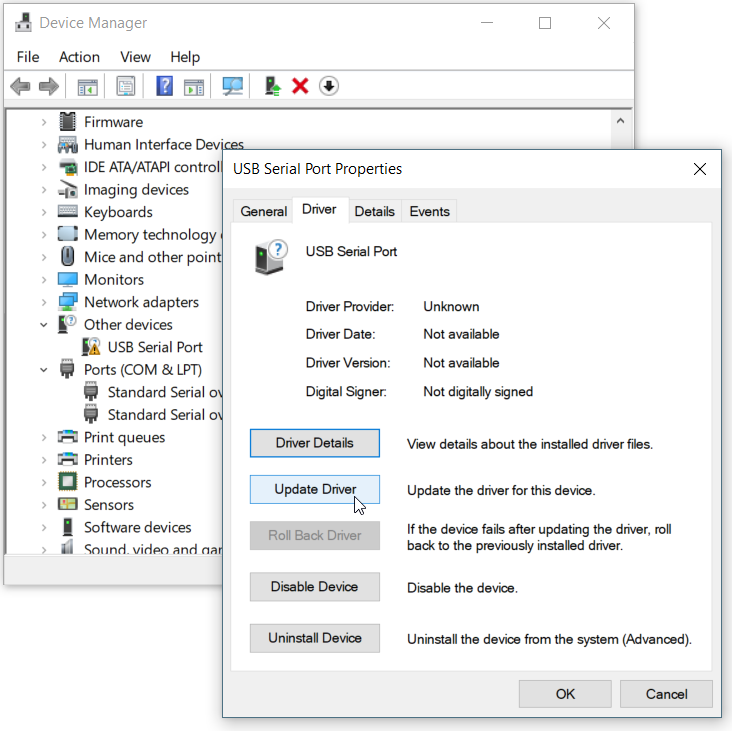
- Solution: Open the Windows device manager and check if there's an unrecognized USB device (yellow exclamation mark icon) in the "Ports (COM & LPT)" or "Other devices" section:
 If so, right-click on it, and then select "Properties...".
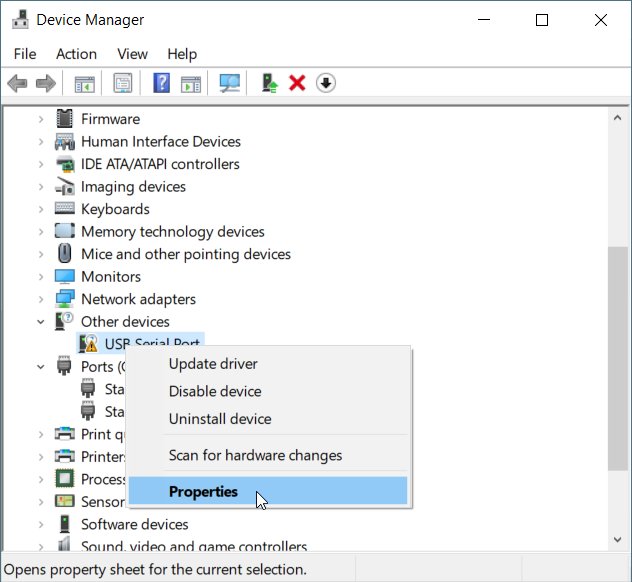
Click on the "Driver" tab and then on "Update driver".
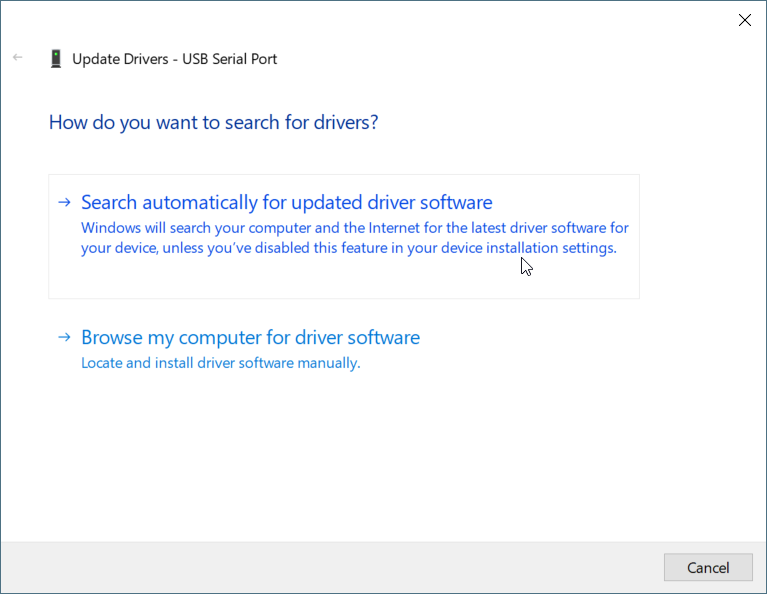
On the next screen, select "Search automatically for updated driver software"
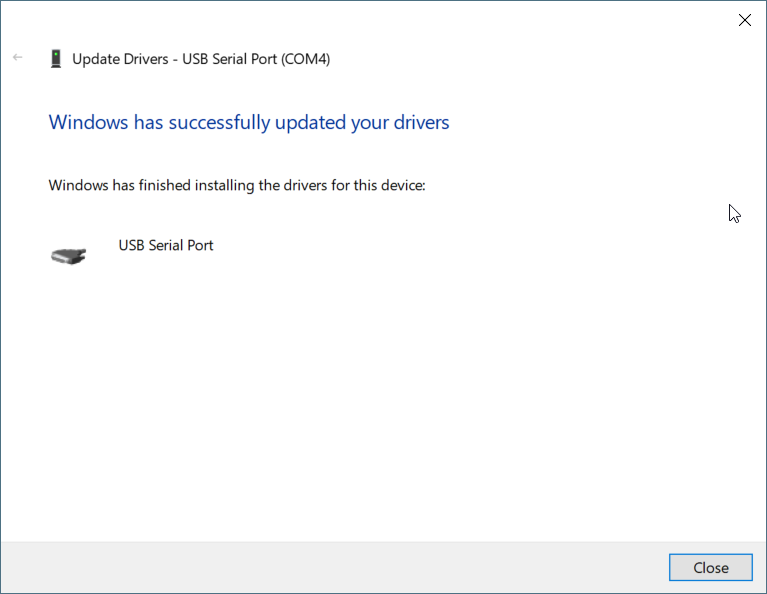
This should automatically install the standard Windows USB COM port driver.
You should now see the USB Serial port in the list of Ports (COM & LPT):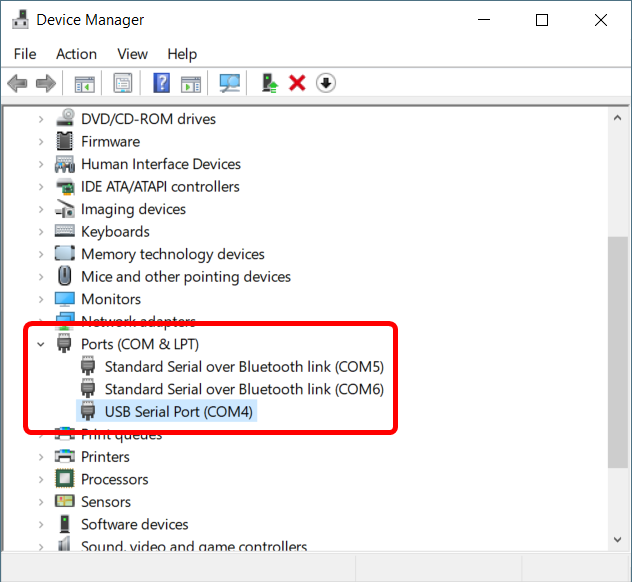
If this doesn't work, please report the problem to support@midwest737simulations.com
- Solution: Open the Windows device manager and check if there's an unrecognized USB device (yellow exclamation mark icon) in the "Ports (COM & LPT)" or "Other devices" section:
- Problem: You're using an Ethernet MCP and its IP address is not correctly configured
- Solution: In contrast to the USB models, Ethernet MCPs can not be identified automatically. You need to manually configure an IP address on the MCP. This IP address must be reachable from your computer and no other device in your network may use the same address. Then you must set the same address in the installer software. There's a button called "I have an Ethernet MCP" on the "Check hardware" screen that guides you through the process.
- Problem: Another software blocks access to the serial port
- Solution: Make sure to terminate any other software that could try to gain access to the serial port the MCP or OVH is connected to. This mainly includes the original CPFlight software, which is the reason why we recommend to uninstall it. But we've also received reports that with an outdated Java version, another instance of our installer software was still running in background and had to be shut down through the Task manager. This very specific problem was resolved by updating to a current version of Java
- Problem: You're using an RS232 version of the MCP without a supported USB-to-serial converter
- Solution: At this point, the formerly sold RS-232 versions are supported only through an FTDI or Prolific USB-to-serial converter. Make sure to install a supported driver for these converters as well
License policy
Every MCP and OVH is entitled for a free 14 day demo license. After that period, running the plugin requires a valid purchased license. The license is tied to the MCP or OVH and can be transferred to another user without cost. In order for the new user to be able to request copies of the license, he or she should get in touch with us and require a license transfer in the web store.
Furthermore, a license for the same MCP or OVH can be used on up to five computers. If you reinstalled you computer from scratch, please rerun the installer and it will be included in the list of authorized computers. If you require a license to work on more than five different computer ids, please get in touch with us.
Captured data
During installation, the installer program captures some technical information about your computer and MCP or OVH and transmits it to our server:
- Computer identification as defined by operating system:
- Windows: registry entry Software\Microsoft\Cryptography\MachineGuid
- Linux: result of function call dbus_get_local_machine_id()
- OSX: IORegistry kIOPlatformUUIDKey value
- Enumeration of devices connected to USB ports and information if they are identified as serial ports
- Initial communication of devices identified as MCP or OVH candidates
From this information, only the CPFlight MCP or OVH serial number and the computer ID are effectively used for the issued license. The remaining items are debug data used exclusively to identify possible problems during the installation process.
A typical set of (anonymized) installation data looks like this:
VERSION=1
MACHINE_ID=pppppppp-qqqq-rrrr-ssss-tttttttttttt
MCP_ID=XXXXXXX
;
; Additional information: ; ADD EVENT: usb-1-2@0 xxxx:xxxz (hid) \\.\HID#VID_xxxx&PID_xxxz#6&aaaaaaaa&0&0000#{xxxxxxxx-yyyy-hhhh-vvvv-wwwwwwwwwwww}
; ADD EVENT: usb-1-3-3@0 0403:6001 (serial) COM2 ; Possible CPFlight panel detected, will be tested
; ADD EVENT: usb-1-12@1 bbbb:cccc (hid) \\.\HID#VID_bbbb&PID_cccc&MI_01&COL01#7&3FF52B&0&0000#{xxxxxxxx-yyyy-hhhh-vvvv-wwwwwwwwwwww}
; ADD EVENT: usb-1-3-2@0 dddd:eeee (hid) \\.\HID#VID_dddd&PID_eeee#7&jjjjjjj&0&0000#{xxxxxxxx-yyyy-hhhh-vvvv-wwwwwwwwwwww}
; ADD EVENT: usb-1-1@0 xxxx:ffff (hid) \\.\HID#VID_xxxx&PID_ffff#6&kkkkkkkk&0&0000#{xxxxxxxx-yyyy-hhhh-vvvv-wwwwwwwwwwww}
; ADD EVENT: usb-1-13@0 xxxy:gggg (hid) \\.\HID#VID_xxxy&PID_gggg#6&lllllll&0&0000#{xxxxxxxx-yyyy-hhhh-vvvv-wwwwwwwwwwww}
; ADD EVENT: usb-2-4@0 xxxy:hhhh (hid) \\.\HID#VID_xxxy&PID_hhhh#7&mmmmmmmm&0&0000#{xxxxxxxx-yyyy-hhhh-vvvv-wwwwwwwwwwww}
; ADD EVENT: usb-1-4@3 xxxz:iiii (hid) \\.\HID#VID_xxxz&PID_iiii&MI_03#7&nnnnnnnn&0&0000#{xxxxxxxx-yyyy-hhhh-vvvv-wwwwwwwwwwww}
; Port COM2 found, no more data expected
; Panel found on port: COM2, serial number: XXXXXXX
; CPFlight panel recognized on COM2
; COM2: MOD485EFI1COM2
; COM2: CHIAVEXXXXXXX
; COM2: V01 000
; COM2: KCPF
; COM2: K020
; COM2: K038
; COM2: K041
; COM2: K018
; COM2: V02 100